
MB-500 · Question #322
Drag and Drop Question A company uses Dynamics 365 Finance. The company stores its software repository in a Git- based version control system. The company requires you to add a new feature to the…
The correct answer is From a Git command line tool or user interface, select the existing branch you want to branch from.; Create a new branch that includes all recent changes.; Edit, save, and commit the code changes.; Push code and create a pull request.; Pull and merge any new changes to the existing branch since the original branching. Git Feature Branch Workflow - Explained This question tests your knowledge of the standard feature branch workflow used in professional development environments like those supporting Dynamics 365 Finance customizations. --- Why This Order? The sequence follows the principle…
Question
Exhibit
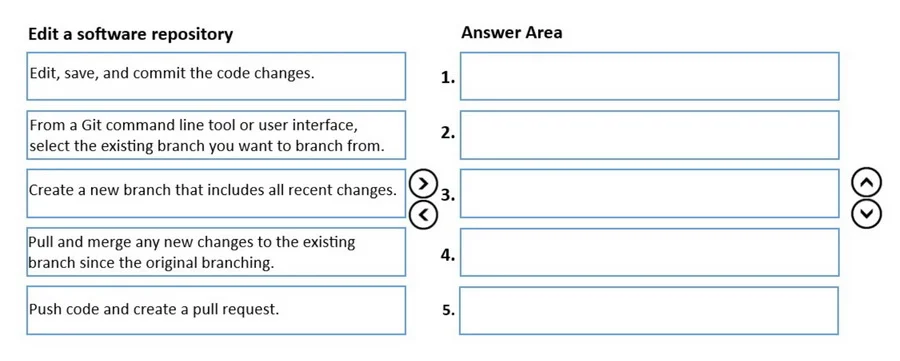
Answer Area
Drag items
Correct arrangement
- From a Git command line tool or user interface, select the existing branch you want to branch from.
- Create a new branch that includes all recent changes.
- Edit, save, and commit the code changes.
- Push code and create a pull request.
- Pull and merge any new changes to the existing branch since the original branching.
Explanation
Git Feature Branch Workflow - Explained
This question tests your knowledge of the standard feature branch workflow used in professional development environments like those supporting Dynamics 365 Finance customizations.
Why This Order?
The sequence follows the principle: isolate → develop → integrate → reconcile.
Step-by-Step Breakdown
Step 1: From a Git command line tool or user interface, select the existing branch you want to branch from.
You must first navigate to the correct base branch (typically main or develop) before creating your feature branch. If you skip this, your new branch may start from the wrong commit history, inheriting unintended changes or missing required ones. This is your starting point - you cannot branch from nowhere.
Step 2: Create a new branch that includes all recent changes.
With the correct base branch selected, you create a new feature branch. This isolates your work from the main codebase, protecting other developers from your in-progress changes. The phrase "includes all recent changes" confirms you branched from an up-to-date base.
Common mistake: Branching from an outdated local copy of the base branch. Always ensure the base branch is current before branching.
Step 3: Edit, save, and commit the code changes.
Now on your isolated feature branch, you implement the new feature. You commit your changes to your local branch, creating a versioned record. Committing happens before pushing - commits are local until pushed.
Common mistake: Skipping commits and pushing all changes at once, or committing directly to the main branch.
Step 4: Push code and create a pull request.
You push your local branch to the remote repository, making it visible to the team. You then open a pull request (PR), formally requesting that your changes be reviewed and merged into the base branch. This initiates the code review process.
Step 5: Pull and merge any new changes to the existing branch since the original branching.
This step surprises many people - why pull after creating the PR? Because during your code review period, other developers may have merged changes into the base branch. Before your PR can be approved and merged, you must sync those changes into your feature branch to resolve any conflicts. This is the "update branch" action you see in GitHub or Azure DevOps.
Common misconception: Many assume pulling happens before pushing. While you should keep your branch current during development, this final pull/merge is specifically the reconciliation step required to make your PR merge-ready after review.
Summary Table
| # | Action | Why Here |
|---|---|---|
| 1 | Select existing branch | Sets correct starting point |
| 2 | Create new branch | Isolates your work |
| 3 | Edit, save, commit | Develops the feature locally |
| 4 | Push + create PR | Shares work, starts review |
| 5 | Pull + merge new changes | Resolves drift before final merge |
Topics
Community Discussion
No community discussion yet for this question.