
MB-500 · Question #69
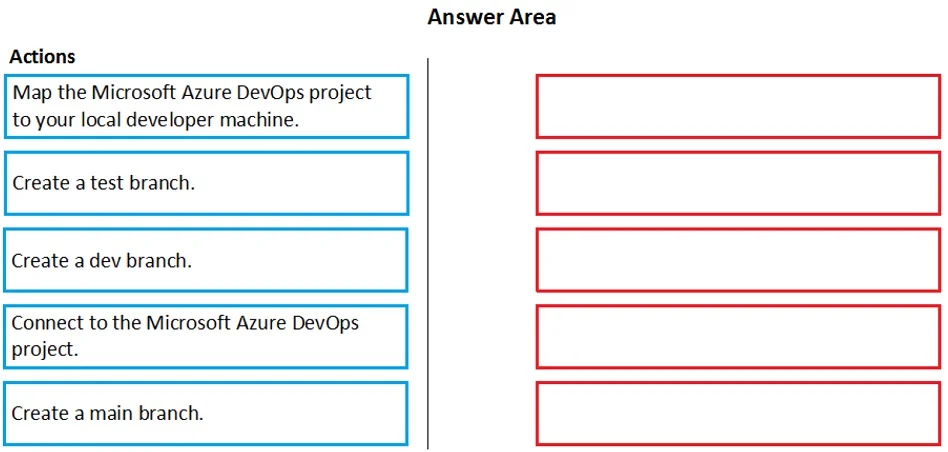
Drag and Drop Question You are configuring your developer environment by using Team Explorer. There are several developers working on a customization. You need to ensure that all code is checked in…
The correct answer is Connect to the Microsoft Azure DevOps project.; Create a main branch.; Create a dev branch.; Create a test branch.; Map the Microsoft Azure DevOps project to your local developer machine. Explanation: Azure DevOps Branch Setup Order This question is about the correct workflow for setting up a branching strategy in Azure DevOps using Team Explorer. --- Why This Order? The sequence follows a strict dependency chain: you cannot configure what you haven't connected…
Question
Exhibit
Answer Area
Drag items
Correct arrangement
- Connect to the Microsoft Azure DevOps project.
- Create a main branch.
- Create a dev branch.
- Create a test branch.
- Map the Microsoft Azure DevOps project to your local developer machine.
Explanation
Explanation: Azure DevOps Branch Setup Order
This question is about the correct workflow for setting up a branching strategy in Azure DevOps using Team Explorer.
Why This Order?
The sequence follows a strict dependency chain: you cannot configure what you haven't connected to, and you cannot branch from what doesn't exist yet.
Step-by-Step Breakdown
1. Connect to the Microsoft Azure DevOps project
Prerequisite for everything else.
Team Explorer requires an active connection to Azure DevOps before any remote resources (repos, branches, work items) are visible or accessible. Without this, no other actions are possible in the UI.
2. Create a main branch
The root branch must exist before child branches can be created.
main (or master) is the trunk of your repository. In Git/TFVC, all other branches are forked from an existing branch. You cannot create dev or test without a parent branch to branch from. This is a hard technical dependency.
3. Create a dev branch
Integration branch for active development, branched from main.
dev is where developers merge their work before it reaches production. It must come before test because test is typically branched from dev (or at minimum follows dev in the branching hierarchy). This reflects a standard GitFlow or trunk-based branching pattern.
4. Create a test branch
Validation branch, downstream of dev.
test exists to isolate QA/testing work from active development. It is branched after dev because it represents a later stage in the pipeline (dev → test → main).
5. Map the Microsoft Azure DevOps project to your local developer machine
Local workspace mapping happens last, after the remote structure is established.
Mapping (workspace mapping in TFVC, or cloning in Git) pulls the remote repo structure to your local machine. You map after the branches exist remotely so that the full branch structure is available locally. Doing this before creating branches would mean your local environment is missing the dev and test branches.
Common Mistakes
| Mistake | Why It's Wrong |
|---|---|
| Mapping before connecting | You need a connection before mapping is possible |
Creating dev or test before main | No parent branch exists to fork from |
| Mapping before creating branches | Local workspace would be missing the dev/test branches |
Creating test before dev | Breaks the branching hierarchy and pipeline flow |
Key Concept
The note says more than one correct order exists - the flexibility is typically around steps 3 and 4, since in some workflows test could be branched from main rather than dev. However, the connection and main branch steps are always first and second, and local mapping is always last.
Topics
Community Discussion
No community discussion yet for this question.