MB-230 · Question #187
Drag and Drop Question A company uses Dynamics 365 Customer Service. When resolving a case, agents must enter the actions taken. You need to customize the case resolution form so that it includes a…
The correct answer is In the Customer Service admin center app, open the Case settings.; Set the Resolve case dialog setting to Customizable dialog.; Open the main case resolution form.; Add the field for actions taken to the case resolution form.; Save and publish the form. Dynamics 365: Customizing the Case Resolution Form Why This Order The sequence follows a strict dependency chain: you must enable the feature before you can access it, and you must access it before you can modify it. --- Step-by-Step Breakdown 1. In the Customer Service admin…
Question
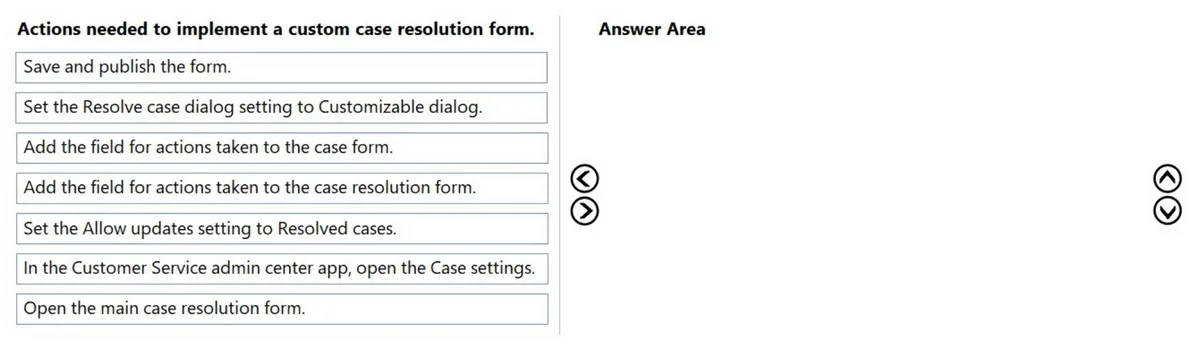
Drag and Drop Question A company uses Dynamics 365 Customer Service. When resolving a case, agents must enter the actions taken. You need to customize the case resolution form so that it includes a custom field that shows actions taken. Which five actions should you perform in sequence? To answer, move the appropriate actions from the list of actions to the answer area and arrange them in the correct order. NOTE: More than one order of answer choices is correct. You will receive credit for any of the correct orders you select. Answer:
Exhibit
Answer Area
Drag items
Correct arrangement
- In the Customer Service admin center app, open the Case settings.
- Set the Resolve case dialog setting to Customizable dialog.
- Open the main case resolution form.
- Add the field for actions taken to the case resolution form.
- Save and publish the form.
Explanation
Dynamics 365: Customizing the Case Resolution Form
Why This Order
The sequence follows a strict dependency chain: you must enable the feature before you can access it, and you must access it before you can modify it.
Step-by-Step Breakdown
1. In the Customer Service admin center app, open the Case settings.
This is the mandatory starting point. The Case Resolution dialog customization setting lives here - you cannot configure it from anywhere else. Everything downstream depends on first reaching this configuration panel.
2. Set the Resolve case dialog setting to Customizable dialog.
By default, the case resolution dialog is a standard (non-customizable) dialog - you cannot add fields to it. Switching this to Customizable dialog is the gate that unlocks the ability to edit the form. If you skip this step and try to find the resolution form, the customizable form simply doesn't exist yet as an editable entity.
Common misconception: Many people think they can just open the form editor and find the case resolution form immediately. Without toggling this setting first, the form isn't exposed for customization.
3. Open the main case resolution form.
Once the dialog type is set to customizable, you navigate to the Case Resolution main form in the Form editor (via Power Apps / Customizations). You must open this specific form - not the Case form - because the resolution dialog is a separate entity (incident resolution).
Common mistake: Selecting "Add the field for actions taken to the Case form" (the distractor). The Case form and the Case Resolution form are different forms on different entities. Adding the field to the Case form does nothing for the resolution dialog.
4. Add the field for actions taken to the case resolution form.
With the correct form open, you now add your custom field. The field must already exist on the incident resolution entity (or you create it). This is pure form configuration - drag the field onto the form canvas.
5. Save and publish the form.
In Dynamics 365, form changes are not live until published. Saving stores the draft; publishing deploys it to users. This is always the final step in any form customization workflow.
Why the Two Distractors Are Excluded
| Excluded Item | Why It's Wrong Here |
|---|---|
| Add the field to the Case form | Wrong entity - the case resolution dialog is incident resolution, not incident (Case). |
| Set Allow updates to Resolved cases | This controls whether resolved cases can be edited after resolution. It's unrelated to customizing the resolution dialog itself. |
Key Takeaway
The order enforces a configure → unlock → navigate → customize → deploy pattern. Each step creates a prerequisite for the next; reversing any two adjacent steps either does nothing or produces an error.
Topics
Community Discussion
No community discussion yet for this question.
