MB-800 · Question #166
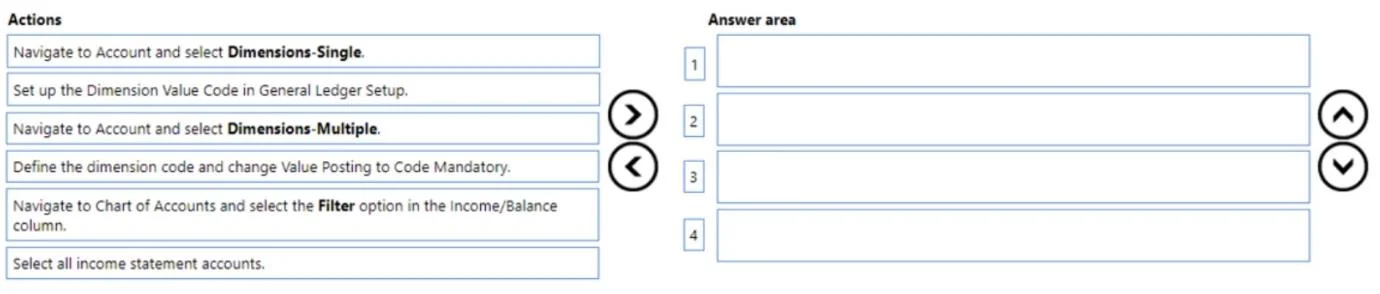
Drag and Drop Question You set up a new company for a customer. The customer requires that two global dimensions be automatically checked at transaction when income statement accounts are used. You…
The correct answer is Navigate to Chart of Accounts and select the Filter option in the Income/Balance column.; Select all income statement accounts.; Navigate to Account and select Dimensions Multiple; Define the dimension code and change Value Posting to Code Mandatory. Explanation: Setting Up Mandatory Dimensions for Income Statement Accounts Context: This is a Microsoft Dynamics 365 Business Central question about enforcing global dimension entry on income statement accounts using Dimensions Multiple (bulk assignment). --- Why This Order?…
Question
Exhibit
Answer Area
Drag items
Correct arrangement
- Navigate to Chart of Accounts and select the Filter option in the Income/Balance column.
- Select all income statement accounts.
- Navigate to Account and select Dimensions Multiple
- Define the dimension code and change Value Posting to Code Mandatory.
Explanation
Explanation: Setting Up Mandatory Dimensions for Income Statement Accounts
Context: This is a Microsoft Dynamics 365 Business Central question about enforcing global dimension entry on income statement accounts using Dimensions Multiple (bulk assignment).
Why This Order?
The logic follows a filter → select → configure pattern. You must narrow down the accounts before you can act on them as a group.
Step-by-Step Breakdown
Step 1: Navigate to Chart of Accounts and select the Filter option in the Income/Balance column.
You must first isolate income statement accounts from all G/L accounts. Filtering by Income/Balance = Income Statement is the mechanism that narrows the Chart of Accounts list to only the relevant accounts. Nothing else can happen in bulk until this filter is applied.
Why not start elsewhere? You can't select all income statement accounts without first filtering to see only them.
Step 2: Select all income statement accounts.
With the filter active, you now select all visible (filtered) records - typically via Select All or Ctrl+A. This prepares the multi-row selection required for the next step.
Common mistake: Trying to use Dimensions Multiple before selecting records. The action won't apply to all accounts unless they are selected first.
Step 3: Navigate to Account and select Dimensions Multiple.
With multiple accounts selected, you use Dimensions Multiple (not Dimensions Single) to open a shared dimension configuration window that applies changes to all selected accounts simultaneously. This is the key to doing it "at once" as the question requires.
Common mistake: Choosing Dimensions Single - this only configures one account at a time, making bulk setup impossible.
Step 4: Define the dimension code and change Value Posting to Code Mandatory.
Inside the Dimensions Multiple window, you specify the global dimension code (e.g., Department, Cost Center) and set Value Posting = Code Mandatory. This forces users to enter a dimension value whenever a transaction posts to any of the selected income statement accounts.
Why not "Set up the Dimension Value Code in General Ledger Setup"? That setting configures default global dimensions at the company level - it does not enforce mandatory checking at the account level. It's a distractor here.
Summary of Rejected Items
| Item | Why Excluded |
|---|---|
| Dimensions Single | Only works on one account at a time - not "all at once" |
| Set up Dimension Value Code in General Ledger Setup | Sets company-wide defaults, not per-account mandatory rules |
Key Takeaway
The correct sequence enforces Code Mandatory at the account level in bulk: Filter → Select All → Dimensions Multiple → Set Code Mandatory. The filter and selection steps are prerequisites for the bulk action; skipping or reordering them breaks the workflow.
Topics
Community Discussion
No community discussion yet for this question.