AZ-800 · Question #238
SIMULATION You need to ensure that the Azure file share named share1 can sync to on-premises servers. The required source files are located in a folder named \\dc1.contoso.com\install. You do NOT need
Sign in or unlock AZ-800 to reveal the answer and full explanation for question #238. The question stem and answer options stay visible for context.
Question
SIMULATION You need to ensure that the Azure file share named share1 can sync to on-premises servers. The required source files are located in a folder named \dc1.contoso.com\install. You do NOT need to specify the on-premises servers at this time. To complete this task, sign in the required computer or computers. Answer:
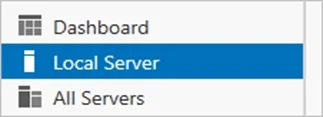
Deploy Azure File Sync Use Azure File Sync to centralize your organization's file shares in Azure Files, while keeping the flexibility, performance, and compatibility of an on-premises file server. Azure File Sync transforms Windows Server into a quick cache of your Azure file share. You can use any protocol that's available on Windows Server to access your data locally, including SMB, NFS, and FTPS. You can have as many caches as you need across the world. Phase 1: Prepare Windows Server to use with Azure File Sync [Maybe it can be skipped] Phase 2: Deploy the Storage Sync Service Phase 3: Install the Azure File Sync agent Phase 1: Prepare Windows Server to use with Azure File Sync [Maybe it can be skipped] For each server that you intend to use with Azure File Sync, including each server node in a Failover Cluster, disable Internet Explorer Enhanced Security Configuration. This is required only for initial server registration. You can re-enable it after the server has been registered. Note: You can skip this step if you're deploying Azure File Sync on Windows Server Core. Step 1: Open Server Manager. Step 2: Click Local Server:
Step 3: On the Properties subpane, select the link for IE Enhanced Security Configuration. Step 4: In the Internet Explorer Enhanced Security Configuration dialog box, select Off for Administrators and Users:
Phase 2: Deploy the Storage Sync Service The deployment of Azure File Sync starts with placing a Storage Sync Service resource into a resource group of your selected subscription. Step 1: To deploy a Storage Sync Service, go to the Azure portal, click Create a resource and then search for Azure File Sync. In the search results, select Azure File Sync, and then select Create to open the Deploy Storage Sync tab. Step 2: On the pane that opens, enter the following information:
Name: A unique name (per region) for the Storage Sync Service. Subscription: The subscription in which you want to create the Storage Sync Service. Resource group: A resource group is a logical group of Azure resources, such as a storage account or a Storage Sync Service. You can create a new resource group or use an existing resource group for Azure File Sync. Location: The region in which you want to deploy Azure File Sync. Only supported regions are available in this list. Step 3: When you are finished, select Create to deploy the Storage Sync Service. Phase 3: Install the Azure File Sync agent The Azure File Sync agent is a downloadable package that enables Windows Server to be synced with an Azure file share. Step 1: You can download the agent from the Microsoft Download Center. When the download is finished, double-click the MSI package to start the Azure File Sync agent installation. [Here: The required source files are located in a folder named \dc1.contoso.com\install] Step 2: Complete the Wizard. Reference:
https://learn.microsoft.com/en-us/azure/storage/file-sync/file-sync-deployment-guide
Exhibit
Options
- ADeploy Azure File Sync
Unlock AZ-800 to see the answer
You've previewed enough free AZ-800 questions. Unlock AZ-800 for full answers, explanations, the timed quiz mode, progress tracking, and the master PDF. Question stem and options stay visible so you can still see what's on the exam.