
Microsoft
MB-280 · Question #146
Drag and Drop Question In your organization, Dynamics 365 Customer Insights - Data contains information about online purchases made by customers, sourced from a table ingested from your e-commerce…
Sign in or unlock MB-280 to reveal the answer and full explanation for question #146. The question stem and answer options stay visible for context.
Create Dynamics 365 Customer Insights - Data unified profiles from different data sources
Question
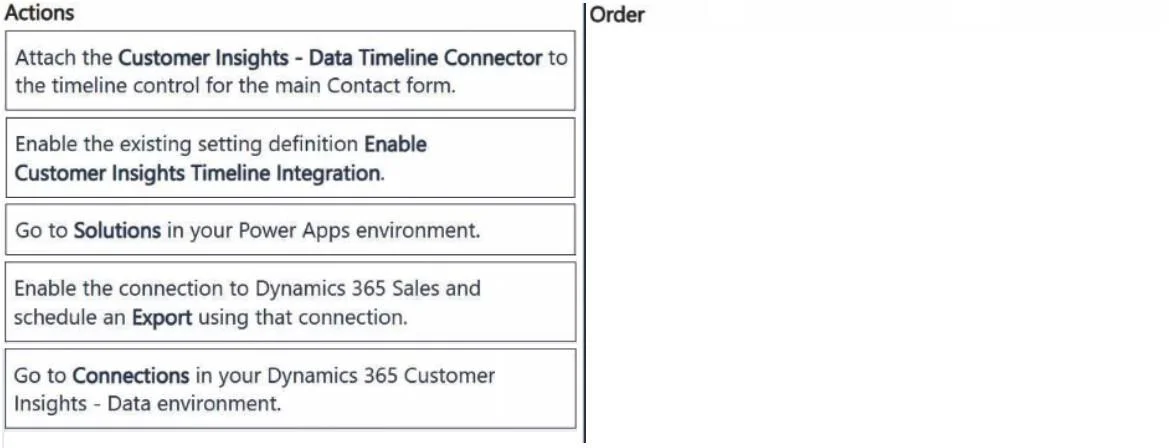
Drag and Drop Question In your organization, Dynamics 365 Customer Insights - Data contains information about online purchases made by customers, sourced from a table ingested from your e-commerce platform. This information is useful to your sellers because they want to gain a complete understanding of all purchases made by their customers, and not just purchases managed using Dynamics 365 Sales Opportunity records. You need to make these online purchases visible to sellers in the timeline of the Contact records in Dynamics 365 Sales. Which three actions should you perform in sequence? To answer, move the three appropriate actions from the list of actions to the answer area. Arrange the three actions in the correct order. Answer:
Exhibit
Answer Area
Drag items
Attach the Customer Insights - Data Timeline Connector to the timeline control for the main Contact form.Enable the existing setting definition Enable Customer Insights Timeline Integration.Go to Solutions in your Power Apps environment.Enable the connection to Dynamics 365 Sales and schedule an Export using that connection.Go to Connections in your Dynamics 365 Customer Insights - Data environment.
Unlock MB-280 to see the answer
You've previewed enough free MB-280 questions. Unlock MB-280 for full answers, explanations, the timed quiz mode, progress tracking, and the master PDF. Question stem and options stay visible so you can still see what's on the exam.
Topics
#Customer Insights - Data#Contact timeline#activity data#Sales integration