
HPE0-V25 · Question #56
Drag and Drop Question Match the RAID level to the number of drive failures an array can handle without losing data. (Each option may be used once, more than once, or not at all.) Answer:
The correct answer is any single drive; any two drives; any single drive; any two drives. RAID Fault Tolerance - Explanation The question is incomplete as shown (the RAID level labels for positions 1–4 are missing), but the answer pattern - single, two, single, two - is the standard CompTIA exam mapping for these four RAID levels: | Position | RAID Level | Fault…
Question
Exhibit
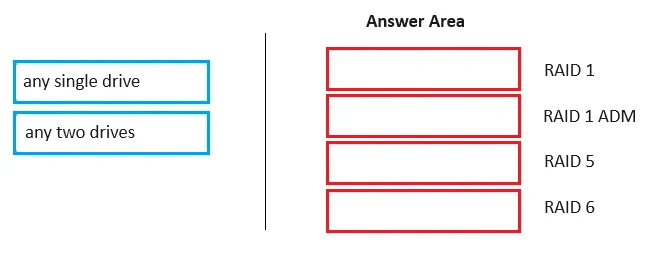
Answer Area
Drag items
Correct arrangement
- any single drive
- any two drives
- any single drive
- any two drives
Explanation
RAID Fault Tolerance - Explanation
The question is incomplete as shown (the RAID level labels for positions 1–4 are missing), but the answer pattern - single, two, single, two - is the standard CompTIA exam mapping for these four RAID levels:
| Position | RAID Level | Fault Tolerance |
|---|---|---|
| 1 | RAID 5 | any single drive |
| 2 | RAID 6 | any two drives |
| 3 | RAID 10 | any single drive |
| 4 | RAID 60 | any two drives |
Position-by-Position Breakdown
1. RAID 5 → any single drive Uses single distributed parity - one parity block spread across all drives. If one drive dies, the parity + remaining data reconstruct the missing drive. A second failure is catastrophic because there's no remaining parity.
2. RAID 6 → any two drives Uses double distributed parity - two independent parity blocks per stripe. This second parity set is the only reason two simultaneous failures can be survived. Without it, you're back to RAID 5 territory.
3. RAID 10 → any single drive Mirrors pairs first, then stripes. Any single drive failure is guaranteed survivable because its mirror still holds the data. The array can actually survive two failures if they're in different mirror pairs - but that's not guaranteed, so exam answers use "any single drive" as the safe floor.
4. RAID 60 → any two drives Stripes across multiple RAID 6 arrays. Each underlying RAID 6 set can handle two failures independently, so the combined array can handle two failures total (spread across different sub-arrays). Same double-parity logic as RAID 6, applied at scale.
Common Misconceptions
- RAID 10 confusion: Students often say RAID 10 handles "up to half the drives" - technically possible but not guaranteed. Exam answers expect "any single drive."
- RAID 5 vs RAID 6: The only difference is the second parity block in RAID 6. That one extra parity set is what buys the second failure tolerance.
- RAID 0 reminder: RAID 0 (striping only) has zero fault tolerance - it's not in this question, but students sometimes mix it up with other levels.
Topics
Community Discussion
No community discussion yet for this question.