
MB-330 · Question #111
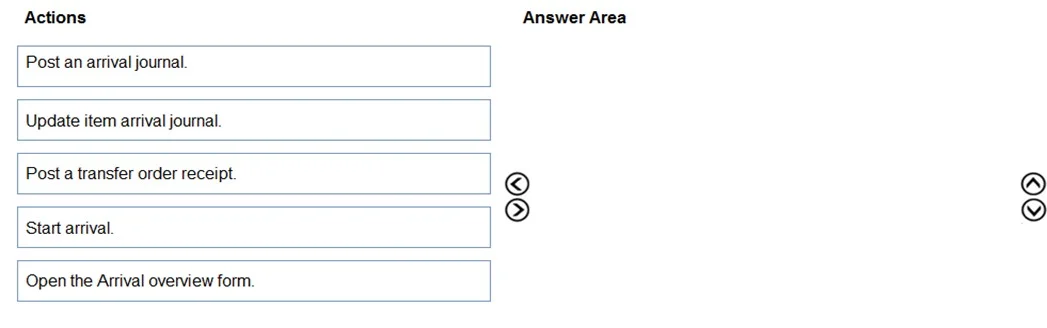
Drag and Drop Question A company opens a new warehouse facility. You need to receive items on a transfer order by using an arrival overview. In which order should you perform the actions? To answer…
The correct answer is Open the Arrival overview form.; Start arrival.; Update item arrival journal.; Post an arrival journal.; Post a transfer order receipt. Receiving Items via Arrival Overview in D365 F&O - Step-by-Step Breakdown This process describes the standard inbound transfer order receipt workflow using the Arrival Overview in Microsoft Dynamics 365 Finance & Operations. --- The Correct Order & Why --- 1. Open the Arrival…
Question
Exhibit
Answer Area
Drag items
Correct arrangement
- Open the Arrival overview form.
- Start arrival.
- Update item arrival journal.
- Post an arrival journal.
- Post a transfer order receipt.
Explanation
Receiving Items via Arrival Overview in D365 F&O - Step-by-Step Breakdown
This process describes the standard inbound transfer order receipt workflow using the Arrival Overview in Microsoft Dynamics 365 Finance & Operations.
The Correct Order & Why
1. Open the Arrival overview form
This is the mandatory entry point. The Arrival Overview aggregates all expected inbound shipments and transfer orders in one place. You cannot initiate any arrival process without first navigating here - there is nothing to act on until you identify the incoming transfer order. Skipping this step means working blind.
2. Start arrival
After selecting your transfer order in the Arrival Overview, clicking Start arrival triggers the system to automatically generate an item arrival journal. This is a system action - it creates the document you will work with in the next step. You cannot have an arrival journal to update (step 3) until the system creates one here.
Common mistake: Candidates sometimes think the journal must be manually created first. It is not - "Start arrival" creates it for you.
3. Update item arrival journal
Now that the arrival journal exists, you open it and update the lines - verifying or adjusting received quantities, batch/serial numbers, storage dimensions, etc. This is the data-entry/validation step before anything is posted. Nothing is committed to inventory yet.
Common mistake: Posting before updating. If quantities differ from the expected transfer order lines, skipping this step means posting incorrect data.
4. Post an arrival journal
Once the journal lines are accurate, you post the arrival journal. This is the action that physically registers items into inventory - stock levels update at the receiving warehouse. The items are now in the system, but the transfer order itself is still financially open.
5. Post a transfer order receipt
This is the financial/logistical close-out step. Posting the transfer order receipt marks the transfer order as received, reduces the "in-transit" quantity, and completes the document lifecycle. It can only happen after the physical arrival (step 4) is posted - the system requires inventory to already exist before it can close the receipt.
Common mistake: Candidates sometimes reverse steps 4 and 5, or think posting the transfer order receipt is the same as posting the arrival journal. They are distinct: the journal handles physical inventory; the receipt posting handles the transfer order document.
Summary Mental Model
Find the order → Trigger journal creation → Fix the data → Post inventory → Close the document
Each step is a gate: you cannot proceed to the next without completing the prior one. The split between step 4 and step 5 (two separate posts) is the most commonly misunderstood part - they serve different purposes in the system.
Topics
Community Discussion
No community discussion yet for this question.