
AZ-400 · Question #542
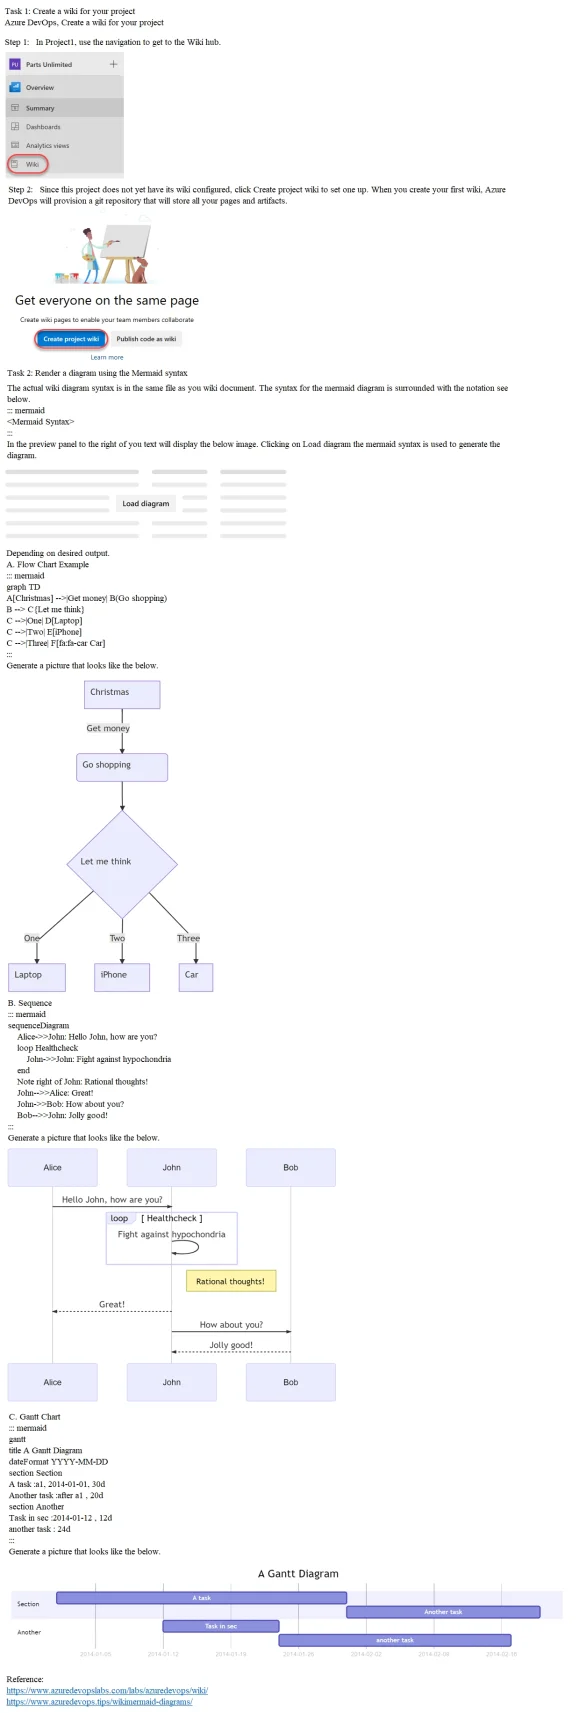
SIMULATION For Project1, you need to create a project wiki named Wiki1 that uses the Mermaid syntax to render a diagram. A sample of the desired output is stored in C : \Resources\TCPHandshake.png…
Azure DevOps: Creating a Wiki with Mermaid Diagrams Overall Goal The goal is to create a project wiki in Azure DevOps (Project1) and use Mermaid - a text-based diagramming syntax - to render a diagram (a TCP handshake visualization) inside a wiki page. This tests your ability…
Question
Exhibit
Explanation
Azure DevOps: Creating a Wiki with Mermaid Diagrams
Overall Goal
The goal is to create a project wiki in Azure DevOps (Project1) and use Mermaid - a text-based diagramming syntax - to render a diagram (a TCP handshake visualization) inside a wiki page. This tests your ability to use Azure DevOps Wikis and understand that Mermaid syntax is natively supported for rendering diagrams without uploading images.
Step-by-Step Reasoning
Step 1: Create a new wiki for Project1, named Wiki1
Azure DevOps projects don't have wikis by default - you must explicitly provision one. Naming it Wiki1 matches the requirement. If you skip this, there's nowhere to add pages.
Two wiki types exist: Project wiki (what this asks for) and code wiki (backed by a Git repo). Choose "Project wiki" here.
Step 2: Navigate to the Wiki hub
The Wiki hub is the dedicated section in Azure DevOps for managing wiki content. You must be in the correct hub to create and edit pages. Navigating elsewhere (e.g., Repos or Boards) gives you no wiki editing options.
Step 3: Add a new wiki page named 'Mermaid Diagram'
Pages are the content units within a wiki. Creating and naming the page correctly ensures the grader can locate your work. Skipping this means you have no page to paste content into.
Step 4: Copy the Mermaid syntax from C:\Resources\TCPHandshake.png
The PNG file shows the desired output of the diagram so you can reverse-engineer or copy the Mermaid code that produces it. In a real exam simulation, the .png typically contains or accompanies a code block like:
```mermaid
sequenceDiagram
    Client->>Server: SYN
    Server->>Client: SYN-ACK
    Client->>Server: ACK
```
If you skip this step and write the wrong syntax, the diagram either won't render or won't match the expected output.
Step 5: Paste the Mermaid syntax into the wiki page
Azure DevOps wiki pages use Markdown. Mermaid diagrams are embedded using a fenced code block with the mermaid language identifier:
```mermaid
sequenceDiagram
    ...
```
Pasting the correct syntax into the editor body is what drives the rendering. If you paste plain text without the fenced code block, it renders as text, not a diagram.
Step 6: Verify the diagram renders automatically
Azure DevOps renders Mermaid diagrams in the Preview tab or after saving. This verification confirms your syntax is valid and the output matches TCPHandshake.png. If the diagram doesn't render, it indicates a syntax error or wrong diagram type.
What Goes Wrong If Steps Are Out of Order
| Skipped/Reordered Step | Consequence |
|---|---|
| Skipping Step 1 | No wiki exists; can't create pages |
| Skipping Step 3 | No page to paste content into |
| Pasting before copying (Step 5 before 4) | Wrong or missing content |
| Skipping Step 6 | Can't confirm syntax is valid before submitting |
Memory Tip
"Create -> Navigate -> Add -> Copy -> Paste -> Verify" - think of it as the standard document publishing workflow: provision the container, open the editor, create the document, gather the content, insert it, then proof it.
A useful mnemonic: C-N-A-C-P-V -> "Can New Articles Contain Perfect Visuals?"
Topics
Community Discussion
No community discussion yet for this question.